Showing posts with label vegetarian. Show all posts

One Pot Vegetable Biryani


Mixed Vegetable Biryani in a pressure cooker - with vegan option
Vegetable Biryani


After all the meat that we had eaten to usher in the new year, it was time for some vegetable detox. On a serious note, I ended up buying way too many vegetables from the produce market on the way back from PYO strawberries at Phil Greig's. Further, biryani is a very easy to carry picnic food too, considering we are planning a small hike/picnic tomorrow - marking the completion of the 4 day weekend down under. The weather was quite unkind for the first 2.5 days. Here's hoping for better weather tomorrow. 

Coming to the biryani - there are many ways to make a biryani - from the cumbersome dum biryani to mughlai biryani to this adaptation of a pulao - a one pot meal. Most households in middle class India would make some version of a pressure cooker biryani with the dum biryani saved for special occasions.


Don't let the long list of ingredients deter you in anyway. It is very simple and easy to put together.

Note : I use a gas cooker which I will swear by anyday and the timings may vary if you use any other type of cooker.

Print This Page Prep time:
Cook time:
Total time:

Ingredients : Serves 4
    An easy one pot, flavour packed meal of vegetables and rice ready in 40 minutes
  • 2 tbsp ghee/clarified butter (replace with oil for vegan)
  • 2 tbsp neutral oil
  • 1 large onion
  • 4 green chillies (adjust as per taste)
  • 4 cloves of garlic
  • 1 inch piece of ginger
  • 1 tsp whole black pepper corns
  • 1 2inch long cinnamon stick
  • 4 cloves
  • 4 green cardamom
  • 1 star anise
  • 1 bay leaf
  • 1 small tomato
  • 2 medium sized potato
  • 1 medium sized carrot
  • 10 green beans
  • 1/4 cup green peas
  • 1/4 tsp turmeric powder
  • 1 tsp coriander powder
  • 1 tsp cumin powder
  • 1 tbsp red chilli powder
  • 1/2 tsp garam masala powder
  • 1.5 cups of rice - I used sona masuri but you can use basmati rice
  • 1 cup of coconut milk
  • 2 cups of water
  • 1 tbsp lemon juice
  • A generous pinch of kasuri methi(optional)
  • Salt to taste - I used about 1 tbsp
  • Coriander to garnish
  •  
How I made the One Pot/Pressure Cooker Vegetable Biryani
  1. Finely slice the 1 large onion
  2. Slit the 4 green chillies (adjust per taste)
  3. Heat 2 tbsp ghee and 2 tbsp oil in a pressure cooker
  4. Throw in the whole spices - 1 cinnamon stick, 4 cloves, 4 green cardamom, 1 star anise, 1 bay leaf
  5. Once the aroma rises, throw in the onions and sliced green chillies
  6. Turn the heat to low and let the onions fry. Keep an eye on them from time to time and proceed with the prep for the remaining.
  7. Peel the 4 cloves of garlic and inch knob of ginger. Pound them along with 1 tsp whole black pepper corns in a mortar and pestle to as fine a paste.
  8. Quarter the 2 potatoes.
  9. Chop the carrot into 2inch long pieces
  10. Chop the green beans into 2 inch long pieces
  11. Mix the onions. Add 1/2 tsp of salt to aid the browning
  12. Prepare the 1/4 cup of green peas by microwaving for 30 seconds in water if using frozen
  13.  Chop the 1 tomato
  14. Pick and wash the rice.
  15. Once the onions are dark golden brown, add the ginger garlic pepper paste
  16. Fry for a minute until the raw smell is gone. 
  17. Mix 1/4 tsp turmeric powder, 1 tsp coriander powder, 1 tsp cumin powder, 1 tbsp red chilly powder in a little water and add it to the cooker. 
  18. Fry for a minute and then throw in the 2 quartered potatoes
  19. Fry for about 5 minutes.
  20. Throw in the tomato fry until fat separates.
  21. Put in the 1.5 cups washed rice, 1 chopped carrot and 10 green beans. Fry for a minute.
  22. Add the peas, 1 cup coconut milk, 2 cups of water
  23. Put in the 1/2 tsp garam masala, generous pinch of kasuri methi and lemon juice. 
  24. Adjust the salt such that the water tastes a little bit on the salty side. 
  25. Close the lid. Increase heat.
  26. Once the pressure starts to rise, turn heat back to low and cook on low for 8-10 minutes and turn off. Let the steam release on its own.
  27.  

    Serve with raita. I blended 4tbsp yoghurt with 2tbsp fresh coconut scrapings, salt and 1/2 tsp cumin seeds. To this I added another 4tbsp yoghurt and whipped it through. If you don't have coconut, just fresh cumin powder transforms the yoghurt to a delightful raita.
    Use whipped coconut cream or coconut yoghurt to make it a complete vegan meal.

Nutrition facts: Per Serving
366 calories
15.5 grams fat


1

Beetroot, Feta and Dill Quiche (Indian flavours) - In a Philips AirFryer

Happy Bastille Day!

We had eaten this beetroot quiche and I wanted to recreate it as soon as I saw that beets were the produce of the week. However, I adapted it to be more likeable to the Indian taste buds. The sweetness of the beetroot goes very well with the sharpness of the goat's cheese feta and the dill then just comes in and lifts those flavours completely.
Beetroot Feta Dill Quiche
Indian Style Beetroot Feta and Dill Quiche


For the Quiche base (Serves 2 as a meal)
Preparation Time :
Cooking Time :
Ingredients

  1. All purpose flour - 1/2 cup
  2. Whole wheat flour/Rice flour/All purpose flour - 1/2 cup [NOTE: You could just use 1 cup of all purpose flour]
  3. Salt - 3/4 tsp
  4. Red chilly powder - 1/2 tsp
  5. Cold butter cut into cubes - 1/4 cup (salted is fine) [NOTE : You could use upto 1/3 cup. The more you use, the more crisp and flaky the resultant tart will be]
  6. Ice cold water - 2 tbsp or more to get the dough together
  7.  
How I made the Quiche base:
  1. In a bowl, mix the flours, red chilly powder and the salt.
  2. To this, add the butter and mix it in until it forms coarse bread crumbs. This can be done in a food processor as well.
  3. Add the water little by little until the dough just comes together.
  4. Wrap in cling film and put into the fridge for a minimum of 30 minutes.
  5. Pre heat the airfryer to 180 degree C.
  6. Take the dough out of the fridge and roll out into a .5cm thick circle on a cling film.
  7. Flip the dough into the quiche/tart tray using the cling wrap to hold it all together. Ensure that there are no cracks
  8. Use a fork and make some holes in the dough.
  9. Blind bake the base for 15 minutes.  If using a proper oven, blind bake for 25 minutes.
This base is good for baking other kinds of savoury tarts as well.
    For the beetroot filling
    Preparation Time :
    Cooking Time :
    Ingredients :(Serves 2 as a meal)

    1. Beetroot - 1 large
    2. Onion - 1 small
    3. Green Chilly - 1 or 2 according to taste
    4. Garlic - 3 cloves
    5. Red chilly powder - 1 tbsp
    6. Turmeric powder - 1/4 tsp
    7. Garam masala powder - 1/2 tsp
    8. Oil - 1 tbsp
    9. Water - 1/2 cup
    10. Salt to taste
    Assembly :
    1. Goat's milk feta cheese - 1/4 block - coarsely broken into largish crumbs by hand
    2. Eggs - 2 beaten
    3. Dill - about 4 tbsp chopped finely
    4. Toasted walnuts
    How I made it :
    For the beetroot filling:
    • Peel the beetroot
    • Chop the beetroot into 0.5cm wedges - this helps also with presentation
    • Chop the onion finely
    • Chop the green chillies
    • Pound the garlic into a rough paste
    • Heat 1 tbsp oil in a pan.
    • When hot, add the green chillies, garlic and onions.
    • Saute till onions are translucent.
    • Add the red chilly powder and fry for 10-15 seconds. Take care not to burn the powder.
    • Add the beetroot. 
    • Add salt to taste 
    • Stir fry for about a minute.
    • Add the water and let this cook for about 10 minutes, preferably till all the water has evaporated and the beetroot is 80% cooked.
    • Add the garam masala powder and turn off heat.
    Indian Beetroot Feta Dill Quiche Recipe
    Beetroot Feta Dill Quiche


      For the Assembly :

      1. Place one layer of the beetroot masala into the quiche base.
      2. Pour half the egg mix.
      3. Sprinkle some of the dill and goat's cheese feta.
      4. Top with another layer of the beetroot. You can place the beetroot wedges such that they are popping out as an edge
      5. Top with the remaining dill and goat's cheese
      6. Pour the remaining egg so that the gaps are all filled in.
      7. Top with walnuts and bake at 160 degree C for 15 minutes or until the egg has set. If using a normal oven, bake at 180 degree C for about 25-30 minutes.


      A riot of flavours - strength of dill pairing well with the sharpness of the feta mingling into the sweetness of the beet

      0

      Spiced Vegetable Somen Recipe


      Spiced Vegetable Somen

      My adaptation of the Japanese noodle salads. The Redergize salad from the food truck garage changed the way I saw salads. I have concluded that salads, rather than a cooked meal, can outplay the taste buds. I have, now, stocked up on quinoa and somen noodles, amongst other items, to make quick weekday lunches and dinners. This is a quick weekday lunch which can be had cold as well.
      A quick, healthy dinner almost just thrown together with vegetables in the fridge
      Recipe by Joey
      Prep time:
      Cook time:
      Total time:
      Yield: 2 servings
      Ingredients
      • 1 bundle Somen noodles
      • 1 cup shredded vegetables like carrots, cabbage, red cabbage
      • 2 spring onions chopped
      • 2 tbsp toasted sesame seeds
      • 4 cloves of garlic
      • 4 dry red chillies (adjust as per spice level desired)
      • 2.5 tbsp soya sauce
      • 1.5 tbsp olive oil
      • 1 tbsp maple syrup
      • Salt to taste
      • Coriander leaves for garnish
      How I made the Somen Noodle Salad
      1. Cook the somen noodles as per the instructions on the pack.
      2. Blitz together the garlic, soya sauce, red chillies and oil.
      3. Mix in the maple syrup into the above blitzed mixture.
      4. Mix in the vegetables and the noodles.
      5. Sprinkle with toasted sesame seeds and garnish with coriander leaves. 
      Best had cold. 
      0

      A complete meal - Cauliflower Pulao And Veggie Kofta Gravy

      A busy but fulfilling day at work is essential for me to be in a really good mood to cook. And sometimes I come home to cook a hearty meal just to feel like I have achieved something for the day.
      Some trawling revealed all tomato based malai kofta curries and I was looking for a creamy white gravy to put the cream to good use. So I just decided to make it my way and oh boy - we were licking our plates and then the pan after the contents were emptied into up the dabbas for the next day's lunch. To add more veggies to the meal, I made it along with Cauliflower Pulao. I've made this kind of pulao with Cabbage before and it was amazing but since I wanted to include as many veggies into the meal as we had the lemon creamcheese muffins for lunch, I added the cauliflower instead.
      Veggie Kofta Gravy


      cauliflower florets

      For the Cauliflower Pulao (Serves 4):
      Preparation Time : 10 mins
      Cooking Time : 15 mins
      Ingredients

      1. Basmati Rice - 1 cup
      2. Coconut Cream - 1/2 cup
      3. Cinnamon - a 1 inch long stick
      4. Cloves - 4
      5. Oil - 1 tbsp
      6. Onion - 1 sliced
      7. Cauliflower florets - 2 cups
      8. Green Chillies - 2 slit
      9. Cumin seeds - 1 tbsp
      10. Salt to taste
      11. Water - 1 cup
      How I made Cauliflower Pulao :
        cauliflower pulao tadka
      1. Wash and soak basmati rice.
      2. In a cooker, heat 1 tbsp oil.
      3. Throw in cumin seeds, cinnamon and cloves. Allow them to crackle.
      4. Once they crackle and fill your nostrils with their strong aromas, throw in the green chillies.
      5. Fry for 30 seconds and then add the onions.
      6. Fry the onions till translucent.
      7. Next add the Cauliflower florets.
      8. Fry for 2 minutes.
      9. Add coconut cream, water and adjust salt.
      10. Add drained rice. 
      11. Cover and wait for the pressure to build.
      12. Once the pressure has built up, lower the flame and leave for 8 minutes. 
      13. Turn off flame.
      14. Fluff up once the pressure is released.
      For the Veggie Kofta Gravy (Serves 4):
      Preparation Time : 30 minutes
      Cooking Time : 30 minutes
      Ingredients :(Serves 4)
      For the Koftas:
      1. Potatoes - 2 medium sized
      2. Carrot - 1 small finely chopped
      3. Green Beans - 10 finely chopped
      4. Green Chilly - 1 or 2 according to taste
      5. Cashewnuts - 1 tbsp chopped
      6. Raisins/Kismis - 2 tbsp chopped
      7. Salt to taste
      8. Red chilly powder - 1 tsp
      9. Garam masala powder - a pinch
      10. Cornflour - 1-2 tbsp
      11. Jeera/Cumin powder - 1 tsp
      12. Oil for deep frying
      For the Gravy:
      1. Onion - 1 medium sized
      2. Garlic - 1 clove
      3. Ginger - same size as garlic
      4. Cashew bits - 2 tbsp
      5. Khus khus/Poppy seeds - 1 tbsp
      6. Warm water to soak cashew and khus khus
      7. Fresh cream - 1 cup
      8. Water - 1/2 cup
      9. Salt to taste
      10. Cinnamon - a 1 inch stick
      11. Cloves - 4
      12. Kasuri Methi - 1 tbsp
      13. Turmeric Powder - 1/8 tsp
      14. Red chilli powder - 1/2 tsp
      15. Cumin powder - 1/2 tsp
      16. Garam masala powder - 1 tsp
      17. Oil - 1 tbsp
      How I made it :
      For the koftas :
        vegetable kofta recipe
      • Boil the potatoes. 
      • Zap carrot and beans in a microwave safe bowl in the microwave for 3 minutes.
      • Peel, mash potatoes and add to carrot and beans.
      • Add chopped green chillies, salt, red chilly powder, cumin powder and garam masala powder.
      • Add chopped cashew bits, raisins and cornflour.
      • Taste and adjust seasoning according to liking and shape into balls.
      • Heat oil for frying.
      • Fry veggie balls till golden brown and set aside.
      vegetable kofta balls
      vegetable kofta recipe


      For the Gravy :

        Vegetable Kofta Recipe
      1. In a pressure cooker, cook onion and 1 tablespoon of water on high for one whistle.
      2. In warm water, immerse cashew bits and khus khus for 10 minutes.
      3. Puree the onion once the pressure is released.
      4. Grind the cashew and khus khus paste.
      5. Using a mortar and pestle, mash the ginger and garlic.
      6. Heat oil in a pan.
      7. Add the cinnamon and cloves.
      8. Once they crackle and leave out their aromas, add the kasuri methi and fry till fragrant.
      9. Add the onion paste.
      10.  Fry the onion paste till it all comes together as shown in the picture to the right.
      11. Add turmeric powder, cumin powder, red chilli powder and fry for 30 seconds.
      12. Now add the pureed cashew and khus khus paste. 
      13. Fry for 3-4 minutes till the onion and cashew paste blend together well. Adjust salt.
      14. Add the fresh cream and 1/2 cup water. Allow it to come to a boil.
      15. Add garam masala and turn off heat.
      Before serving, place the kofta balls into the gravy and serve hot with rice, pulao or rotis.


      A good dose of veggies making a hearty meal with a rice pulao


      0

      Radish/Mooli Paratha

      Okay, never ever use bare hands to handle the radish in this recipe. Ever! I made this after so long that I forget and ended up having redness and itching on the back of my hand for about an hour. The itching has reduced, thanks to the coconut oil but the redness still persists. Anyways, getting back to the post.

      Another one of my favorites. Parathas are generally loved but stuffed parathas make me feel like I am eating something healthier. Despite their foul smell, these parathas are so delicious that they can hardly be avoided.

      Radish is an edible root vegetable. Baby  radish are used in salads raw. In South India, they are added to sambar and in North India, made into parathas. In Mexico, they have a special radish festival wherein carvings on radish are displayed at common spots.

      Radish juice is considered to have cleansing powers and is good for the kidney. Some also believe that it helps fight cancer. Adding to all those benefits, this recipe ensures to make maximum use of this veggie, so do try it.
      Divine Indian flatbread stuffed with a spiced raddish filling and cooked in desi ghee

      Preparation time : 40 minutes - depends on what method is chosen to extract the radish juice
      Cooking time  : 2 minutes per paratha

      Ingredients:
      For the stuffing:

      1. Radish - 2 medium sized
      2. Cumin Seeds - 1 tsp
      3. Kasuri methi - 1 tsp
      4. Turmeric powder - 1/4 tsp
      5. Red chilli powder - 1/2 tsp
      6. Amchoor/Dry Mango powder - 1/2 tsp
      7. Oil - 1 tbsp
      8. Salt to taste
      For the dough:
      1. Whole wheat flour - I usually take enough to make a smooth dough with the extracted radish juice. So start with a little and add as you go.
      2. Salt to taste
      3. Oil - 1 tbsp
      4. Radish juice - extracted when making the above stuffing. You can use plain water as well.
      How I made it :
      1. Wash and scrape the radish.
      2. Grate the radish. A medium sized grater will do.
      3. Now, extract the juice from the grated radish. You could either use a muslin cloth or wear a food grade glove and squeeze handfuls of radish. Retain this juice. Remember that the more juice you remove, the better. The drier the filling/stuffing, the easier it will be to roll out the paratha.
      4. In a pan, heat 1 tbsp oil.
      5. Put in the cumin seeds.
      6. Once they start to change colour, add the kasuri methi.
      7. In 30 seconds, put in the red chilli powder. 
      8. Before the red chilli powder starts to burn put in the turmeric powder, grated juiced radish and salt to taste.
      9. Fry till the radish goes as dry and all the masalas are well mixed. 
      10. Now add the mango powder. Mix well and let the stuffing cool. Taste and make adjustments to your taste. 
      11. While the stuffing cools, made the whole wheat dough. Mix the flour, salt, oil and radish juice to make a nice smooth soft dough. The dough when pressed with a finger should kind of bounce back. Make sure it is not too watery/sticky as that will make it harder to roll out. Start with a little flour and keep adding as you go as it is not possible to give an exact measurement. The amount of radish juice will differ based on size, freshness and effectiveness of juicing method used. 
      12. Now, split the dough into small balls.
      13. Roll each ball out into a disc of about 5mm thick.
      14. Place a sufficient amount of stuffing, proportional to the size of the disc in the centre.
      15. Pull the ends together as can be seen in the collage above. 
      16. Apply some dry flour and roll out into a thin disc. Don't worry if the dough comes apart. You can always patch it up with some dry flour. Just ensure that you have the filling spread evenly around and the thickness of the paratha/disc is uniform throughout. 
      17. Repeat for all the balls made in step 12, provided there is enough filling. Else use this dough to make simple plain parathas.
      18. Heat a tawa/flat pan. 
      19. One at a time, place the rolled out parathas on the hot pan. Once you see that there are small air pockets forming, apply some oil/ghee and then turn. Lower the heat and let this cook for about a minute or until maillard reaction kicks in and there are enough brown spots. Apply pressure with the means of a flat ladle to help uniform cooking of all areas of the paratha. Turn, increase heat. Apply more oil/ghee if desired. Cook till maillard reactions cause brown spots- about 40 seconds.
      Serve hot with curd/pickle/papad.

      Tips:
      • If you do get redness and itching from handling the radish, apply coconut oil and wave your hand up and about in the air, even if people think that you are crazy. Breathe! It will subside and all will be well.
      • Make the stuffing as dry as possible to enable easy rolling.
      • Make the chapati dough as smooth and non-sticky to enable easy rolling.
      Trivia :
      • Maillard reactions, named after a scientist, are those reactions which cause the browning of food. These occur at temperatures of 120 degree C. It is these maillard reactions that provide that awesome taste to food. Yes, some food have their own flavour but it is this which enhances that flavour as well as the aromas that our nose detect. It is basically a chemical reaction of carbohydrates and proteins in amino acids which releases many sub compounds. These sub compounds are very volatile and escape easily into the air. 
      0

      Panneer Potato Cutlets

      Living in a developed country means "HUGE". Almost nothing is under a kilogram at most supermarkets. Further, this is how one feels one is getting the bang for the dollar being spent. Like I felt when I picked up milk 2 weeks ago. Yes, 2 weeks ago. Coming from India where the milk would not last more than a day, here milk lasts for weeks. It is on my to do list to find out what it is that they add to make the milk last this long.(A friend clarified that the milk sold here is boiled and packed and therefore lasts longer. Thanks) So, I knew we would not consume all of the milk before the "best by" date and so I made some home made panneer. I use my blog as my recipe journal as well, which means, I revisit my own blog to check the recipe of dishes I have tried. Mom's panneer fingers are not on this as it is a business secret for C-store. So obviously, I don't have any written record of the recipe. Being in different time zones from your mother doesn't help either especially when she is definitely going to be fast asleep at the time that you are cooking up your meal.

      Two of India's vegetarian snack favorites come together to make an even tastier snackSo I just put together things that would make a good cutlet and it was good. 

      Ingredients (makes about 25 cutlets, each of about 1.5cm in diameter) :
      For the panneer :
      1. Milk (Full fat works best and avoid UHT/long life milk) - 1 .25 litres
      2. Curd/Yoghurt - 4 tbsp
      3. Vinegar - 1/2 tsp
      For the cutlet :
      1. Panneer - from the above or about 3/4 cup of shredded/grated/minced panneer
      2. Potatoes - 1 large boiled, peeled and mashed
      3. Green Chilly - 2 sliced thinly or chopped
      4. Red chilly powder - 1/2 tsp
      5. Garam masala powder - 1/2 tsp
      6. Bread crumbs - about 1/4 cup + more for dusting - see tips
      7. Salt to taste
      8. Oil for frying
      How I made it :

      1. Pour the milk into a pan and bring to a boil.
      2. Just as the milk boils lower the heat and put in the curd and vinegar. 
      3. Mix well till you see the milk curdle and the fat separate. 
      4. Turn of heat. Drain the water to get fresh soft homemade panneer. Squeeze out as much water as you can from the panneer. This water can be retained and stored to be added to dough to make softer rotis or make naan.
      5. Now, add the panneer to the potato, green chillies, red chilly powder, garam masala powder. 
      6. Adjust the salt. 
      7. This may be a bit sticky so add the bread crumbs to make a dough that is not too sticky. Alternately, put into airtight container and leave in fridge overnight. 
      8. Heat oil in a kadai - sufficient to deep fry.
      9. Spread more bread crumbs on a paper or flat plate.
      10. Make small discs out of the dough. Dunk in more bread crumbs and press in those bread crumbs. Keep aside.
      11. Once oil is hot, deep fry the discs on both sides until golden brown.

      Serve hot with pudina chutney or tomato sauce or mustard sauce

      Tips :
      • You can make bread crumbs from fresh bread. Just put it into a mixie jar and use the pulse option.
      • If you want aired out bread crumbs, you could use dried toast or bread dried in the sun. These serve well to form that crust on the cutlets.
      0

      Quickie Breakfast : Rava Dosa

      As a child I remember having competition with my elder brother as to who would eat more rava dosas. I just love rava dosas and relive those days each time I make rava dosa for breakfast.

      This time my hubby topped it up with making a heart shaped dosa for me making this dish even more special.

      Rawa Dosa is very simple to make and with a simple spicy coconut chutney, can transport you to seventh heaven.

      Preparation Time : 10 minutes
      Cooking time : 5 minutes or less

      Ingredient (Serves 4) :

      1. Rawa - 1/2 cup
      2. Maida - 1/2 cup
      3. Rice flour - 1/2 cup
      4. 1 medium onion chopped
      5. jeera/cumin seeds - 2 tbsp
      6. black pepper corns - 1 tbsp
      7. cashew bits or halves - 3-4 tbsp
      8. Coriander leaves - chopped optional
      9. Oil - 1 tbsp
      10. Salt to taste
      11. Water
      How I made it:
      1. Mix the rawa, maida and rice flour with sufficient water such that the water is about 1 inch above the solids. Don't worry you don't need to get this right at first go. You will see as you read through.
      2. Leave that aside for an hour or so. The solids would settle at the bottom. Ensure now that the water level is at least 1 inch above that of the solids. This adjusts the thickness of the dosa. More water makes it a paper thin roast.
      3. Add the chopped onions, green chillies, chopped coriander, pepper corns. If the cashew bits are roasted, add them as is, else add them in the next step.
      4. Heat oil in a takda pan
      5. Put the jeera and cashew bits. 
      6. Once the jeera is crachling and cashew bits are light brown, add to the dosa batter mix. 
      7. Adjust the salt.
      8. Now, heat a flat pan or tawa.
      9. Pour a ladleful of the dosa mix and swirl it around on the pan, taking care not to let it drop off the sides of the pan/tawa.
      10. Cook on high heat till it starts to brown. 
      11. Flip it over and cook for about 30 seconds.
      12. Serve hot.
      Make sure you serve these with a spicy chutney.

      Tips :
      • If the dosas are sticky, could be that the maida is more so reduce the maida and replace the reduced quantity with rice flour. 
      0

      Carrot and Onion Paratha

      So what do you do when both you and your better half wake up at 3am? Well, it is gonna be a nice and sunny day so we decided to go for a trek at Shakespeare Regional Park. The gates open at 7am so since I a little time on my hands, I decided to make these quickie parathas to take with us as trek grub.

      Preparation time : 10-15 minutes
      Cooking time : 4-5 minutes for each paratha

      Ingredients (makes 6 parathas) :

      1. 1 cup whole wheat flour
      2. 1/3 cup chopped onion
      3. 1/2 cup grated carrots
      4. 1 tbsp jeera/cumin seeds
      5. 1 tbsp kasuri methi
      6. 1/2 tsp red chilli powder
      7. 1 green chilly finely chopped
      8. 3 tbsp oil
      9. Salt to taste
      10. Water to knead the dough
      How I made it:
      1. In a pan, heat up 3 tbsp oil.
      2. Put in the jeera seeds.
      3. Once they crackle, put in the kasuri methi
      4. When the methi begins to get brown, don't let it burn, throw in the onions and green chillies.
      5. Fry till onions start to become soft.
      6. Throw in the carrots, red chilli powder and salt. 
      7. Remember to add a little more salt as the wheat flour will also be added.  So when tasted, this mix should taste a little salty - not too salty.
      8. When the carrots are turning soft, turn off heat and wait for the mix to cool.
      9. When cool, add the flour to the mix and knead into a soft dough.
      10. Separate the dough into 6 balls of uniform size.
      11. Roll out each ball into a circle and for each circle repeat steps 13 onwards.
      12. Heat a flat pan/tawa.
      13. Place the circle. Cook for 30-40 seconds.
      14. Lower heat to medium and turn the parata.
      15. Add a few drops of oil to help the parata cook and remain soft.
      16. After a minute or so, if there are enough brown spots on the paratha, turn the paratha and make the heat back to high. 
      17. Add a little more oil and cook till there are enough brown spots on both sides. Take off heat.

      Serve hot with raita or pickle or pack and carry on a trek. Can be eaten as is.

      All packed and set to go.


      Here's a pic of the beautiful place - a must visit. Do check out my review of the place which is coming up on the blog soon.

      0

      LIGHTing it up DOWN UNDER - err a bit late.

      It's six months since I set foot in the land of the breathtakingly beautiful New Zealand. Time flies but the rollercoaster ride never ends. Well, things are mellowing down now but the initial settling phase was not as smooth as I had expected it to be. "Ignorance is bliss" is not something I used before but we all do learn and our eyes do eventually open up. No wonder we all look back at those times when we were most ignorant as the "best of times". Confused beings that we are, always wanting the good times but trying hard as ever to get ahead. Ha ha ha!

      Six months and we move from my birthday to the birth of my nephew, exactly on Diwali. I smile when I think of the silence back at home on this otherwise unusually noisy day at my house. The hustle and bustle to decide who would go to distribute the sweets and if you had got all the people on the list of people to whom sweets need to be distributed, the packing of the sweets, the visits to the temple, the Lakshmi puja, the Saraswati puja, the Ganesha puja and the best drive around the town to get a glimpse of all the firecrackers for free. (wink)

      Now, Diwali is known as the festival of lights but has many reasons for its significance. One is the return of the beloved Lord Ram from exile for which the lamps are lit and the night sky lit up with crackers to provide sufficient light for the returning lord, on a moon starved night. (Psst...Diwali usually falls on a new moon day). Another is to mark the end of another harvest season which brings us to the reason for this post. 

      It is believed that as a sign of success and prosperity one must eat 7 vegetables on this joyful day and as this blog of mine focusses on recipes amongst other things, I made Sindhi Sai Bhaji with Bhuga Chawara. I ensured that I added as many veggies to the Sai Bhaji as possible. Fortunately for me, I got the quintessential ladies finger here in Auckland. Darn this place, you get a quarter of the veggies you get in India and even if you do get some, you have to buy them frozen. Grrr!!! (Ignorance is bliss until you move to a country only to realize what you have gotten yourself into.) Last year I had made Pav Bhaji with as many veggies.

      Here's how we celebrated Diwali this year.

      The quintessential start to my day - a cup of chai.

      Bachpan ke din yaad dilaane waala lunch - sai bhaji and bhuga chawara - recipe below

      Preparation Time : 5 minutes
      Cooking Time : 12-15 minutes

      Ingredients (Serves 2):
      1. 1 large onion finely sliced
      2. 1 cup of rice
      3. 1 stick of cinnamon
      4. 4 cloves
      5. 1 bay leaf
      6. 1/2 tsp red chilly powder
      7. 4 tbsp oil
      8. 2 cups of water
      9. Salt to taste
      How I made it :
      1. Wash the rice and soak in water
      2. In a pressure cooker, heat the oil
      3. Add the whole garam masala - cinnamon, cloves and bay leaf
      4. Once the aroma spreads, add the onions and fry on medium low heat till the onions caramelize into a nice dark brown colour. Do not burn and the colour is essential for the dish.
      5. Add the red chilli powder and fry for a minute. 
      6. Add 2 cups of water.
      7. Add the rice once the water comes to a boil.
      8. Adjust salt. 
      9. Cover the pressure cooker and when the steam begins to rise, lower flame to minimum and leave for 8 minutes. 
      10. Turn off heat and serve with sai bhaji or dal fry.
      A visit to the Diwali Fest held by the Auckland Council - good food and company and some of the best fireworks I've seen thus far.

      Gulab Jamoons as they were getting ready


      Sandalwood scented tea light candles adorning the corners of my house


      0

      Eggplant/Aubergine Pizza

      As part of the cooking course assignment I had to get into the nutritional information of "prepared eggplant". I assumed there would be a recipe too and had bought this big chinese eggplant from the grocery store. There was no assignment but I had some leftover pasta sauce and hence decided to put that together with the eggplants to clean out the fridge. I had seen a similar dish in a colleague's lunchbox and decided to have a go at it. It was yummy and gone in minutes.

      I made the aubergine two ways this time. 2 slices as below and the remaining I pan fried with Indian spices after seeing this recipe on a friend's blog. Both were delicious.

      This recipe boasts of meeting almost all of one's dietary fibre intake for a day while being low on the calorie intake.


      Preparation Time : 10 minutes
      Cooking time : 40 minutes

      Ingredients (serves 1) :
      1. 1 large Aubergine/Eggplant
      2. 4-5 button mushrooms
      3. 1 small sized onion finely chopped
      4. 2 cloves of garlic crushed
      5. 4 tbsp chopped bell peppers - I did not use this as my pasta sauce was a roasted bell pepper sauce
      6. 1/4 cup pasta sauce/tomato sauce - I used Roasted Peppers Dolmio Pasta Sauce
      7. A handful of grated cheese
      8. Salt to taste
      9. Pepper
      10. Olive oil - a drizzle
      How I made it :


      1. Preheat oven at 180 degree C.
      2. Slice the eggplants lengthwise with the slices being about a cm thick.
      3. Slice the button mushrooms and mix with onions, garlic, pasta sauce.
      4. Adjust salt and pepper.
      5. Spread atop eggplant slices.
      6. Sprinkle with cheese.
      7. Place eggplant slices in ovenproof plate/pan.
      8. Drizzle olive oil on top of slices.
      9. Bake the eggplant slices for 30 minutes.
      10. Serve hot
      2

      Kerala Kadala Curry

      Both Pras and I are morning people and so I'm always on the lookout for quickie breakfast recipes. I believe breakfast is a very important part of the day and should not be missed. Back in India, it was easier to manage breakfast with idlis, dosas, bread, cereal, oats and the occasional parathas on a weekday. Here, in Auckland, the idli and dosa batter is not available ubiquitously, the breads is quite different from what we get in India and hence the hunt for breakfast recipes is on.
      Many people told me about the breakfast biscuits but nah, they aren't to our liking.  For a while I made rawa dosas and ran out of rawa/semolina. It takes some planning to get to the other side of town to purchase "Indian" groceries from the Indian supermarkets.

      Anyhow, I decided to experiment and made this kadala curry to be served with thai rice noodles as a replacement for idiyappam. Except for the little bite to the noodles, it went quite well. So here's a big tick to this breakfast item.

      Kadala curry is mainly made of chickpeas which are a high source of proteins. Since this recipe calls for the use of a pressure cooker as well as not discarding any of the water used, you should get the full benefits of the protein content. Serving this as an accompaniment to a rice based dish makes it a source of carbohydrates as well.

      Preparation Time : 5 minutes if using store bought coconut milk, excluding time to soak the chickpeas
      Cooking Time : 30-40 minutes

      Ingredients (Serves 4):

      1. 1 cup black/dark chickpeas/kadala - washed and left to soak in water overnight
      2. 1 bay leaf
      3. 1 stick of cinnamon
      4. Water to boil the chickpeas
      5. Turmeric Powder - 1/2 tsp
      6. Salt to taste
      7. 1 medium sized onion chopped as finely as you can, need to go to extraordinary lengths
      8. 2 green chillis - slit
      9. Thick Coconut milk - 1/2 cup
      10. A pinch of asafoetida
      11. Red chilli powder - 1/2 tsp
      12. Coriander powder - 1 tsp
      13. Black pepper powder - 1/2 tsp
      14. Curry leaves - a stick or two
      15. mustard seeds - 1 tsp
      16. Oil - 1tbsp
      How I made it :
      1. In a pressure cooker, put in all ingredients from 1 to 6. The water level should be about 1 inch above the chickpeas.
      2. Cook on high for one whistle and then low for 4 whistles.
      3. While the pressure releases, in another pan, heat 1 tbsp oil
      4. Once the oil is hot, put in the mustard seeds and cover till the mustard seeds stop spluttering.
      5. Add the curry leaves and split green chillies.
      6. After 30 seconds, add the onions and fry till they turn pink.
      7. Add the red chilli powder, pepper powder, coriander powder and asafoetida.
      8. After 30 seconds, add the chickpeas and any remaining water.
      9. If there is too much water, allow it to boil till the water reduces to required quantity.
      10. Add the coconut milk and once it comes to a boil, adjust salt and turn off the heat
      Serve hot with idiyappam, appam, puttu or like me thai rice noodles.

      7

      Kumara and Chickpea Patties/Cutlets

      This is one of my own experiments since I got "Down Under". It has been a hit with both friends and hubby alike. The best part - it is easy and Kumara aka Sweet Potato is of really good quality here.


      P.S. I am yet to fully settle in to cooking in a smaller kitchen, so please excuse the lazy picture taken with my phone. But I urge you to try this recipe as it tastes really good.

      Prepation time : 5 minutes
      Cooking time : 10 minutes excluding time to pressure cook the chickpeas and kumara

      Ingredients ( For 10 medium cutlets):
      1. 2 medium sized Kumara/Sweet potato
      2. 1/3 cup boiled chickpeas - soak overnight and boil in salted water, may be 2 whistles on high and 2 whistles on low in a pressure cooker
      3. 1.5 tbsp ginger garlic green chilly paste
      4. 1/4 cup finely chopped onion
      5. 1tsp garam masala powder
      6. 1/4 tsp amchur powder
      7. Oil for deep frying/shallow frying
      8. Salt to taste

      How I made it :
      1. Boil the kumaras - 1 whistle on high in a pressure cooker will do.
      2. Peel and mash the kumaras.
      3. Add all the ingredients listed from 3 to 7 and mix well.
      4. Lastly add the boiled chickpeas.
      5. Shape into cutlets and shallow or deep fry as per preference. When deep frying, please ensure that the oil is very hot else it will just split.
      You could serve these as a snack or make sandwiches or use them in pita pockets. Versatile and tasty.
      0

      Stuffed Capsicum/Bell Peppers

      The Bell Peppers need to be cooked through to really enjoy this dish.The stuffing can be modified as per one's taste. I was inspired to make these again after seeing Sunitha's blog. Sunitha has recently joined the blogging world. Her blog has a beautiful template and she does have an interesting collection of recipes.

      Now, stuffed bell peppers are a definite hit if the stuffing tastes great. It's just like most of the other chaat items - samosa, kachori.
      partially stuffed bell peppers

      All ready to be eaten with dal and roti

      Just before they were zapped in the microwave
      Equipment used :
      • Gas
      • Microwave
      Time taken :
      Preparation time : 10 minutes
      Cooking time : 30 minutes including time to boil potatoes
      Difficulty  : Easy

      Ingredients (serves 4):
      1. Green bell peppers/capsicum - 2
      2. 3 large potatoes
      3. 1/2 cup green peas
      4. 1 onion chopped
      5. 1 tsp ginger garlic paste
      6. 1 tsp oil + a little more to coat on the bell peppers
      7. 1 tsp saunf/fennel seeds
      8. 1 tbsp kasuri methi
      9. 1/2 tsp red chilli powder
      10. 1/2 tsp cumin powder
      11. 1/2 tsp coriander powder
      12. 1 tsp garam masala
      13. 1/4 tsp amchur powder
      14. 2 tbsp chopped cashew bits (optional)
      15. A few raisins chopped (optional)
      16. Salt to taste
      17. 4 tbsp grated cheese
      How I made it :
      1. Slice the bell peppers into two lengthwise. Deseed them. These will serve as our cups. Spread oil on the outer side of the cups.
      2. Boil the potatoes till completely cooked. 
      3. Peel the potatoes and mash.
      4. In a pan, heat oil.
      5. Add the saunf seeds and kasuri methi.
      6. Add the onions once the saunf starts to brown.
      7. If using frozen peas, cover with water and zap in microwave for 2 minutes. If using fresh peas, zap for longer.
      8. When the onions are translucent, add the ginger garlic paste.
      9. When the raw smell goes away, add the green peas.
      10. After a minute, add the red chilly poweder, coriander powder, cumin powder, amchur powder and garam masala powder.
      11. Adjust salt.
      12. Add mashed potatoes.
      13. Fry for a minute.
      14. Turn off heat. Divide the mixture into 4.
      15. Put each part into a capsicum cup. Sprinkle with cheese on top.
      16. Zap in microwave on high for 10 minutes, until the skin starts to wrinkle.
      17. I optionally placed them after zapping on my hot tawa, which was ready for rotis, for two minutes covered. This helps give it a char enhancing the taste.
      1

      Tomato Dal

      My friend brings this dish quite often and it is mouth-wateringly delicious. It is an amazing way to transform the simple dal.
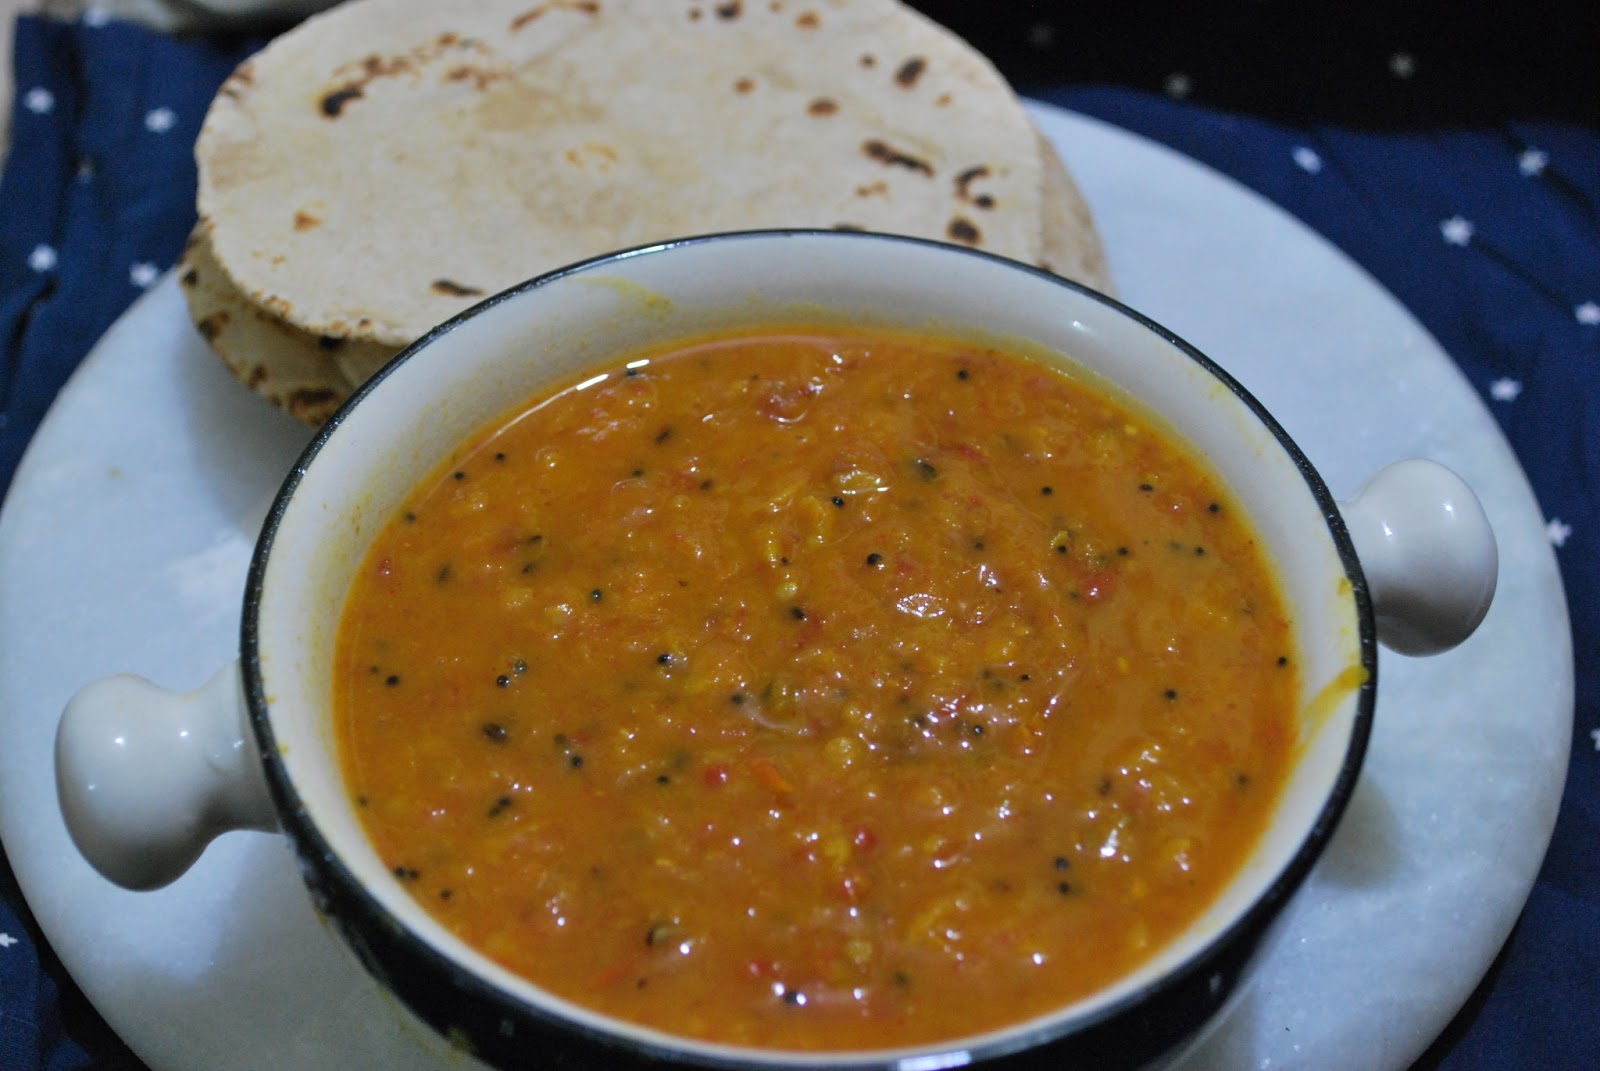
      Tomato Dal with rotis in my newly acquired soup bowls
      Ingredients :

      1. 1/2 cup toor dal
      2. 2 tbsp masoor dal
      3. 2 large tomatoes
      4. A tiny piece of tamarind
      5. 1/2 tsp turmeric powder
      6. Salt to taste
      7. 1 tsp oil
      8. 1/2 tsp mustard seeds
      9. 1/2 tsp cumin/jeera seeds
      10. 2 tbsp chopped onions
      11. 2 pods of garlic crushed
      12. A pinch of hing/asafoetida
      How I made it :
      1. Pick, wash and soak the toor and masoor dal for ten minutes.
      2. In a pressure cooker, add the dal, sufficient water, tomatoes chopped, tamarind, salt and turmeric powder.
      3. Let this boil for one whistle on high and about 4-5 whistles on low.
      4. When pressure releases, heat one tsp oil.
      5. Add the mustard seeds and cumin seeds.
      6. When the mustard stops spluttering, add the onions and garlic.Fry till onions are translucent.
      7. Mix the dals well and add to the tadka. 
      8. Garnish with chopped coriander and serve.
      We had it with rotis and stuffed capsicum. This recipe is a definite keeper. You can avoid the tamarind, if you don't like the sourness it imparts.
      1

      Channa/Chickpea Pulao

      What do you do when you have some channa but not enough to make sufficient chole masala? I decided to make channa pulao. Usually, I'd make this from the leftover chole masala. This is a simple crockpot meal with most of the ingredients found around the kitchen.

      Time taken :
      Preparation : 10 minutes + time for soaking
      Cooking time : 30 minutes(for chickpeas) + 15 minutes

      Difficulty : Easy

      Ingredients (Serves 2) :

      1. 1/2 cup chickpeas soaked overnight
      2. 1 cup rice washed
      3. 1 large onion sliced finely
      4. 2 medium tomatoes finely chopped
      5. 1 tbsp ginger garlic paste
      6. 1 tbsp oil
      7. 1inch cinnamon stick
      8. 4 cloves
      9. 1 bay leaf
      10. 2 tbsp chole masala
      11. 1/2 tsp red chilli powder
      12. 1 tsp lime juice
      13. Salt to taste
      14. Water - 2 cups for the rice + 4 cups to boil the chickpeas
      15. Chopped coriander
      How I made it :
      1. In a pressure cooker, boil chickpeas with 4 cups of water with salt. Give one whistle on high and about 5-6 whistles on low or about 20 minutes on low. This ensures that they are well cooked and soft. Drain any remaining water.
      2. In another the pressure cooker, heat oil.
      3. Add the cinnamon stick, cloves and bay leaf.
      4. Once the cloves start bursting, add the onions.
      5. Fry the onions till dark golden brown. This is what gives the colour as well as imparts some taste.
      6. Add the ginger garlic paste and fry till raw smell goes away, about 2 minutes. 
      7. Add the tomatoes and fry till soft.
      8. Add the red chilly powder, chole masala, salt. Fry for a minute.
      9. Now, add the rice and fry for a minute.
      10. Add the water and the boiled chickpeas.
      11. Adjust salt. Add lime juice.
      12. Let it come to a boil.
      13. Cover the cooker and when the steam starts to build, lower the flame and cook on low flame for 8 to 10 minutes. 
      14. Garnish with chopped coriander and serve hot.

      0

      Stuffed Eggplant Recipe

      Well, I wanted to use up the brinjal as well as cabbage lying in the fridge but could not zero in on one recipe that used both. I finally remembered the walnuts that I had and decided to make this recipe. I made cabbage sambar with the cabbage. Though the original recipe calls for the bigger variety, I made it with the small striped brinjals. The dish has a lot of texture to it because of the walnuts and the combination of the walnuts along with the brinjal is superb. I love walnuts and my dad sends me walnuts from his friend's farm in Ooty. Walnuts are supposed to be good for memory they say. Is it because they're similar in shape to the brain? But they are supposed to be loaded with Omega 3 fatty acids.

      Ingredients :

      1. 6 small striped purple brinjals
      2. 1 medium sized onion finely chopped
      3. 1 large tomato finely chopped
      4. 1/4 cup walnuts chopped coarsely
      5. 1/2 tsp red chilli powder
      6. 1/4 tsp garam masala powder
      7. 1/2 tsp cinnamon powder
      8. 1 tsp + 1tbsp olive oil
      9. Salt to taste
      10. Coriander leaves chopped - 1 tbsp
      11. 30g cheddar cheese grated
      12. Bread crumbs made from one slice of fresh bread - just blitz in the mixie jar.

      How I made it :

      1. Wash brinjal. Halve them.
      2. Remove as much of the core that you can into another bowl. Keep aside to chop finely later.
      3. Place the brinjal shells in salted water with the skin side up and boil for 5-6 minutes or until the skill is soft to touch and feels like it will break easily. This is important else you could get chewy shells which would destroy the dish. Drain, pat dry and keep aside.
      4. Heat 1 tsp olive oil in a pan.
      5. Add the onions. Fry till they turn pink and translucent.
      6. Add the chopped brinjal centers.
      7. After 2-3 minutes add the tomatoes. Fry till the brinjal is almost cooked. About 6 minutes. 
      8. Add the red chilli powder, salt, garam masala and cinnamon powders.
      9. Throw in the walnuts and fry till the brinjal is cooked completely.
      10. Turn off heat and mix in coriander leaves. 
      11. Now dip the eggplant shells in 1tbsp oil and put in oven with skin side down for about 3 minutes. I set the oven to 200 degree C and placed the shells in the topmost rack. 
      12. Spoon in the mixture. Sprinkle bread crumbs and grated cheese.
      13. Bake in oven for 20 minutes at 150 degree C or until cheese has melted and is brown on top.

      Tips :
      1. To ensure that you do not get a chewy shell, boil with skin side up. 
      2. When pre-cooking in oven, place the shells with skin side down to avoid getting a chewy texture.
      3

      Aloo Bathua - ready in a jiffy

      My colleague often mentioned Bathua leaves to me. He is an excellent cook and a perfectionist in almost everything he takes up. When I found these at the local vendor, I picked them up. The vendor gave me some 5 different names for the same and bathua was the only one that got my ears pricked up.

      In a recent article, The Hindu had a recipe based on Bathua leaves and I adapted the same. It was so delicious that it was gone in minutes and I could not take a photograph.

      Ingredients(Serves 2 as a side dish) :

      1. 1 large bunch of bathua leaves
      2. 4 medium potatoes
      3. 2 tsp oil
      4. 1/2 tsp cumin seeds
      5. 1 tsp red chilli powder
      6. 1/2 tsp coriander powder
      7. 1/2 tsp garam masala powder
      8. A pinch of turmeric
      9. Salt to taste
      How I made it :
      1. Boil the potatoes till 3/4 done. About 1 whistle on high and 3-4 minutes on sim in a pressure cooker.
      2. Clean the bathua leaves. In a different pressure cooker, give 1 whistle on high for the leaves.
      3. Cut boiled potatoes into small cubes
      4. Roughly chop the boiled bathua leaves. Drain the water and reserve so that it can be used diluted for making rotis.
      5. Heat oil in a pan.
      6. Throw in the cumin seeds.
      7. Once the cumin seeds crackle or change colour, put in the red chilli powder, turmeric powder and coriander powder.
      8. Swirl it all around for 15 seconds.
      9. Throw in the chopped potato cubes.
      10. Fry on sim for about 5 minutes.
      11. Add the chopped bathua leaves.
      12. Adjust salt. Add the garam masala.
      13. Serve hot with rotis.
      0

      Eggless Ragi Pancakes

      What better way to get back to blogging than with a healthy recipe? Here's what I made for breakfast after being inspired by Appu's ragi pancakes. She made them in a jiffy when I decided to drop in for a cuppa chai :)

      Ingredients : (makes 3 pancakes)

      1. 1/3 cup ragi flour
      2. 1/2 tsp baking powder
      3. 1 tbsp sugar
      4. A pinch of salt
      5. 2 tsp olive oil or any neutral oil
      6. A little less than 1/2 cup of milk
      7. A few dried pumpkin seeds - I usually pop them in the microwave for 2 minutes and once cooled, store in an airtight container. These add some texture to the pancakes - tip borrowed from Appu
      8. 2 tbsp butter/oil
      How I made it :
      1. Mix all the ingredients from 1 through 7 to form a smooth batter
      2. Heat up a tawa or griddle.
      3. Lightly greast hot tawa with butter/oil
      4. Pour a ladleful of batter.
      5. Cover for 45 seconds
      6. When you lift the lid and see nice holes, flip and cook for another 45 seconds to 1 minute.
      I served it with my homemade strawberry preserve. It was my first attempt and I did not add enough sugar so it was a bit tart.
      0

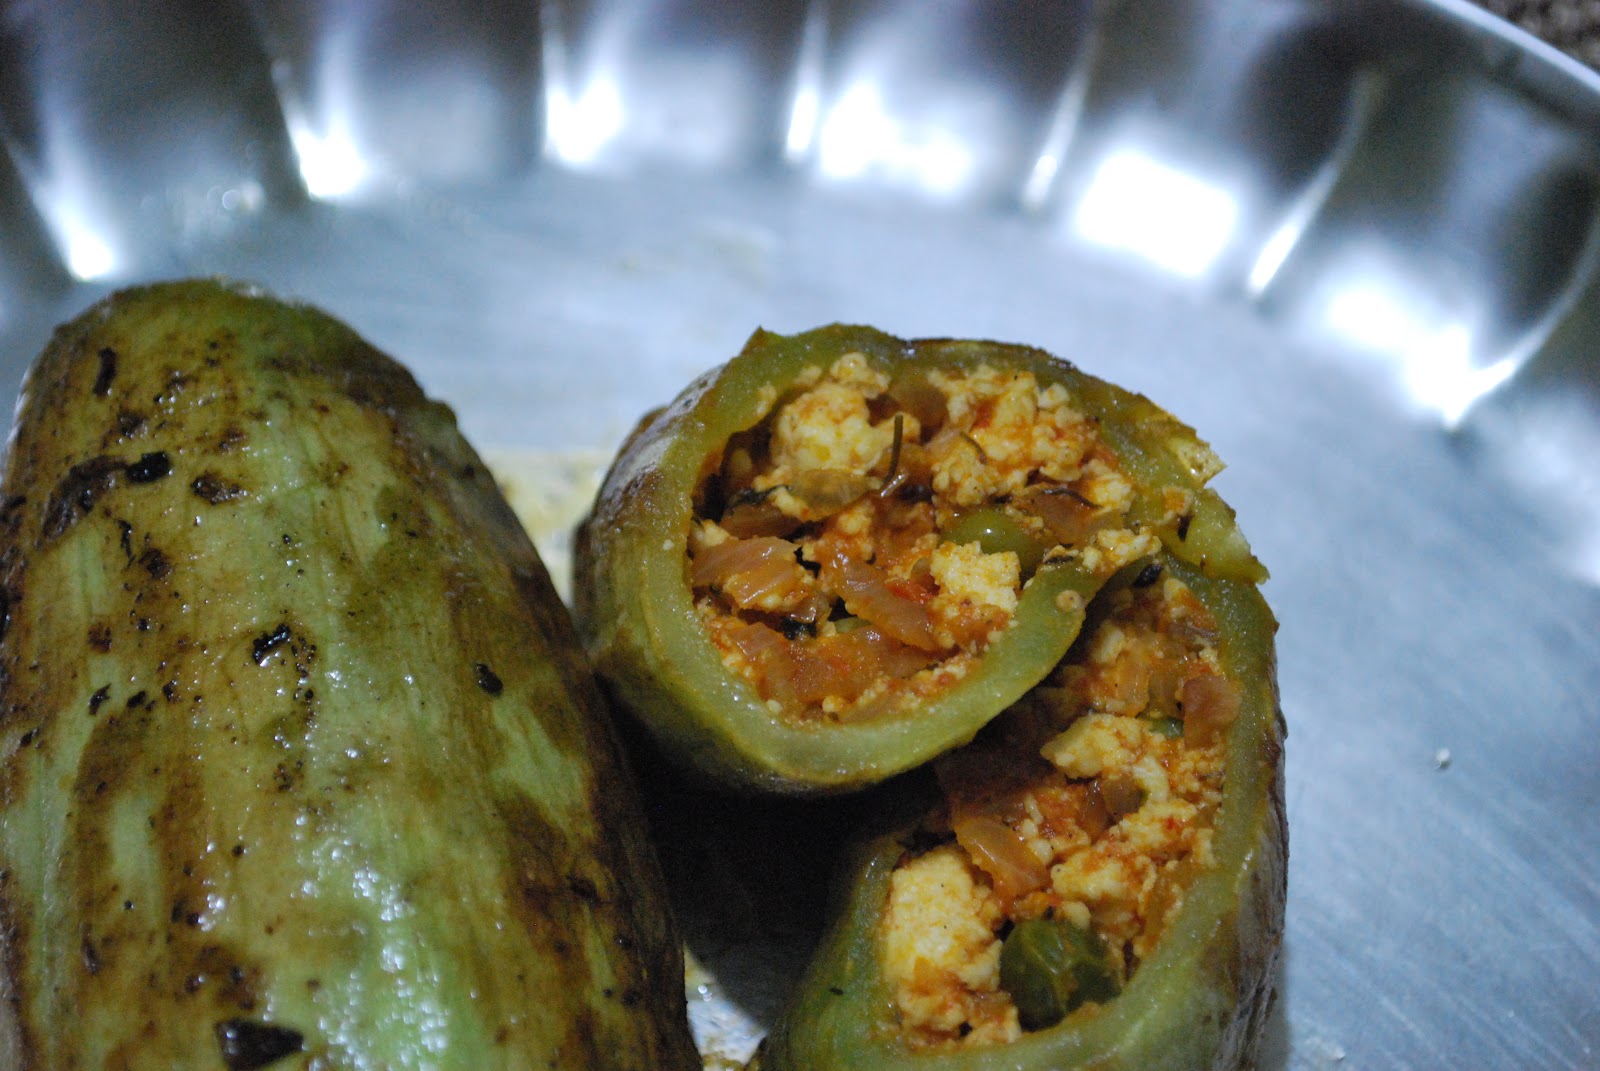
      Panneer Stuffed Snake Gourd recipe

      Well, I did not want to make the same usual stuff with the snake gourd that I'd got at hand and so decided to try and stuff it. I do remember seeing related recipes a very long time back but when I did google for "stuffed snake gourd" I was shocked to see that most of them were stuffed with meat or aloo. I decided to do it with panneer as I had in mind while returning from work.

      I acted smart and made panneer burji. I made that in excess so that I could stuff the snake gourd with the same. It was scrumptuous.


      Ingredients :

      1. Medium snake gourd - peeled and deseeded
      2. Enough panneer burji to stuff in
      3. Salt to rub onto the snake gourd
      4. 2 tbsp oil
      How I made it :
      1. Rub salt onto the snake gourd and cook on high in microwave for 5 minutes or until 3/4th cooked.
      2. Fill it with panner burji
      3. Heat oil in a wide pan.
      4. Shallow fry the stuffed snake gourd pieces
      Serve hot with rotis. Best had hot. As it cools, you may not like the taste of the oil - remember that shallow frying causes food to actually absorb/retain more oil.

      3